
I Turned My Mac Mini Into a Local AI Workstation — Here's Exactly How
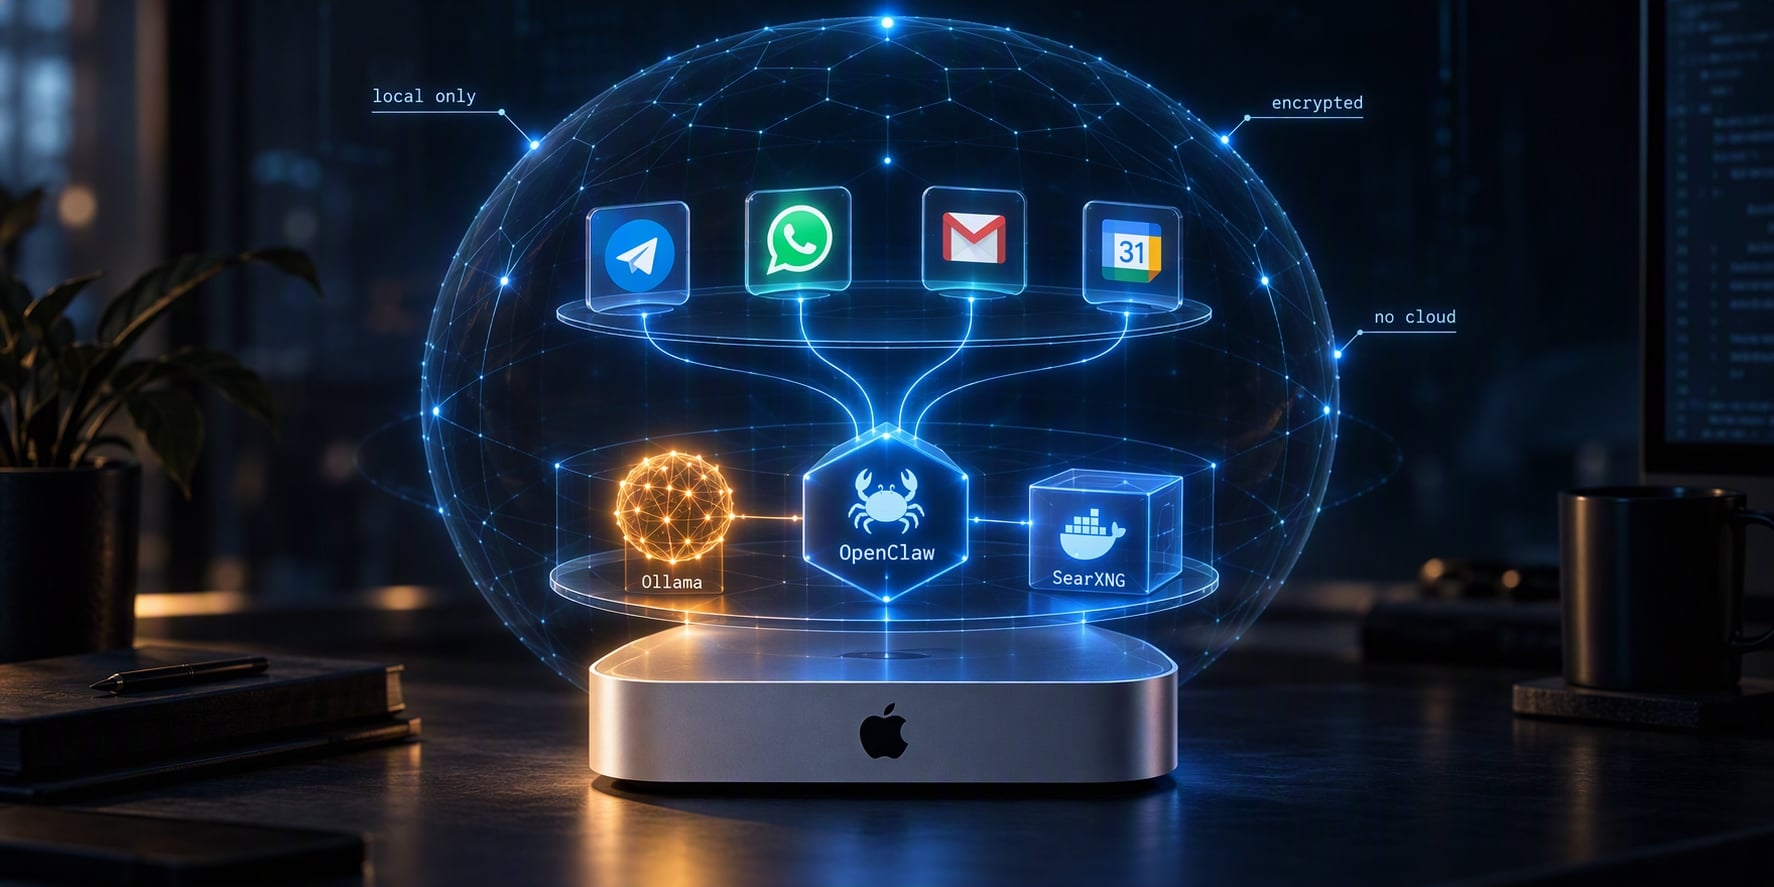
A Mac mini is not a toy. Even the base model can run 8B-parameter models at conversational speeds, host a persistent AI agent, and handle real work without sending a single byte to the cloud. Higher configurations push into 30B–70B territory. The catch is that getting there requires stitching together an inference engine and an agent platform that approaches autonomy in a very different way from a chatbot.
This article walks through the entire setup: configuring your Mac mini as an always-on server, installing Ollama with local models, running OpenClaw for messaging-first autonomous task execution, and adding private web search through a locally hosted SearXNG instance.
Versions and Dependencies
This guide was written and tested against the following versions on October 1, 2026. Software moves fast, especially OpenClaw and its plugin ecosystem, so pin your expectations accordingly. Where a version matters, a note explains why.
Host Environment
| Component | Version | Notes |
|---|---|---|
| macOS | 27.0 (build 26A428) |
Server mode, auto-login enabled |
| Homebrew | 7.0.7 |
Package manager for all CLI tools |
| Node.js | 26.10.0 |
Node 22.22.3 is the minimum; Node 26 is recommended |
| npm | 11.19.1 |
Ships with Node |
Core Stack
| Component | Version | Notes |
|---|---|---|
| OpenClaw | 2026.9.7 (c074824) |
Gateway runtime. This version satisfies the >= 2026.9.7 requirement of the official SearXNG plugin. |
| Ollama | 0.34.4 |
Local LLM inference on 127.0.0.1:11434 |
| Colima | 0.10.3 (commit 00f6c297) |
Headless Docker runtime for macOS, aarch64 |
| colima-pulse | commit 309ec4f, dated 2026-03-22 |
LaunchDaemon manager for Colima at boot |
| Docker CLI | 29.8.2 |
Client only; the daemon runs inside Colima |
| Docker Server | 29.5.2 |
Reported by docker info inside the Colima VM |
| SearXNG (Docker image) | searxng/searxng:latest @ sha256:a07a5cd2da2c63d66e559f9e4d3a3db106cfc6c32fb0ac70abe91cc28bcd7350 |
Running build: 2026.9.30-a9d990033, Python 3.14 inside the container, 377 MB |
| Tailscale | 1.102.5 (Homebrew formula) |
Mesh VPN for the mobile app and remote access. Install with --formula, not --cask. |
yq |
v4.54.1 (mikefarah) |
Command-line YAML processor used to edit Colima config without an editor |
Plugins
| Plugin | Registry name | Version | Notes |
|---|---|---|---|
| OpenClaw SearXNG plugin | @openclaw/searxng-plugin |
2026.9.7 |
Official SearXNG plugin. Requires OpenClaw >= 2026.9.7; the runtime version in this guide meets that requirement. |
| OpenClaw WhatsApp plugin | @openclaw/whatsapp |
2026.9.7 |
Official WhatsApp channel plugin. Installed but disabled by default; enable with openclaw config set channels.whatsapp.enabled true. |
| Google Workspace plugin | @tensorfold/openclaw-google-workspace |
commit 498a680, dated 2026-04-03 |
Community plugin, installed from a local source checkout. Not published to npm with compiled output; see Part 9. |
Compatibility Notes
OpenClaw
2026.9.7is the minimum for the official SearXNG plugin. If you are pinned to an earlier release such as2026.9.6, the install command will fail with a plugin API version error. Either update OpenClaw withopenclaw update, or use a community SearXNG plugin that targets the older API.Node.js 26 vs 22. The article recommends Node 26 for faster gateway startup and lower memory use. Node 22.22.3 is the floor — OpenClaw refuses to start below it.
SearXNG settings schema. SearXNG validates its
settings.ymlagainst a schema on startup. The template in Part 8, Step 4 includesuse_default_settings,server.secret_key,search.formats, anddoi_resolversbecause each of these is required by the current SearXNG schema. Older tutorials omit some of them and fail on newer releases.
Note: If you are reading this months after publication, check
openclaw --versionandopenclaw plugins listfirst. The plugin API moves faster than the core runtime, and the registry may have newer versions than what is documented here.
Architecture Overview
The diagram below shows how all the pieces fit together. Everything inside the dashed border runs on your Mac mini. External services (Telegram, WhatsApp, Google Workspace) are reached over the network.
flowchart LR
    subgraph MacMini["Mac mini (always-on server)"]
        direction TB
        Ollama["Ollama\nLocal LLM inference"]
        subgraph Docker["Colima VM (QEMU + Docker)"]
            SearXNG["SearXNG\nLocal meta-search"]
        end
        OpenClaw["OpenClaw Gateway"]
        Env["~/.openclaw/.env\nSecrets"]
        Ollama -- "HTTP :11434" --> OpenClaw
        SearXNG -- "HTTP :8888" --> OpenClaw
        Env -- "SecretRef" --> OpenClaw
    end

    subgraph Channels["Messaging Channels"]
        TG["Telegram"]
        WA["WhatsApp"]
    end

    subgraph Google["Google Workspace"]
        GM["Gmail"]
        GC["Calendar"]
        GD["Drive"]
        GP["Contacts"]
        GT["Tasks"]
        GS["Sheets"]
    end

    Tailscale["Tailscale\nServe (TLS)"]
    Phone["OpenClaw Mobile App"]

    OpenClaw -- "Bot API" --> TG
    OpenClaw -- "Official Plugin (QR)" --> WA
    OpenClaw -- "Community Plugin" --> GWP["Google Workspace Plugin"]
    OpenClaw -- "HTTP :18789" --> Tailscale
    Tailscale -- "wss://" --> Phone
    GWP --> GM
    GWP --> GC
    GWP --> GD
    GWP --> GP
    GWP --> GT
    GWP --> GS
How to read it:
Ollama serves local models on
localhost:11434. OpenClaw talks to it over HTTP.Colima runs a lightweight Linux VM that hosts the Docker daemon. It starts at boot via a system LaunchDaemon, before any user logs in.
SearXNG runs inside the Colima VM as a Docker container. OpenClaw queries it on
localhost:8888. Queries never leave your network.OpenClaw Gateway is the central agent runtime. It reads secrets from
~/.openclaw/.envvia SecretRefs.Telegram is reached through the Bot API using the token stored in
.env.WhatsApp is reached through the official
@openclaw/whatsappplugin, which pairs via QR code, and usesallowFromfrom.envto restrict senders.Tailscale Serve provides the encrypted HTTPS endpoint that the OpenClaw mobile app connects to. The gateway itself stays bound to loopback; only the tailnet can reach it.
Google Workspace Plugin bridges OpenClaw to Gmail, Calendar, Drive, Contacts, Tasks, and Sheets. Credential and token paths are stored in
.env.
Note: The diagram is illustrative. The key point is that all core components—Ollama, Colima, SearXNG, OpenClaw, Tailscale, and the secrets file—live on the Mac mini.
Part 1: Configure Your Mac Mini as a Server
Before installing any AI tools, you need to make the Mac mini behave like a server. This means three things: it must never sleep, it must log in automatically after a reboot, and it must be reachable remotely.
Enable Remote Login (SSH)
Open System Settings → General → Sharing and toggle Remote Login on. Alternatively, run this in Terminal:
sudo systemsetup -setremotelogin on
Verify it is running:
sudo systemsetup -getremotelogin
Once enabled, you can SSH into the machine from any computer on the same network:
ssh yourusername@your-mac-mini.local
Prevent the Mac from Sleeping
A Mac mini that sleeps drops every attached session and stops every agent. Disable system sleep entirely:
sudo pmset -a sleep 0 disksleep 0 displaysleep 0
Also disable standby, auto power-off, and Power Nap:
sudo pmset -a standby 0 autopoweroff 0 powernap 0 hibernatemode 0
Verify the settings:
pmset -g
You should see sleep 0 and disksleep 0 in the output.
If you want to keep the display off while the system stays awake, use caffeinate:
caffeinate -i -s &
Enable Automatic Login
For the machine to recover from an unattended reboot, it must log in automatically. Go to System Settings → Users & Groups → Automatically log in as and select your user account.
⚠️ Note: FileVault blocks automatic login. If FileVault is enabled, you must either disable it or accept that the machine will require a manual password after a reboot.
Part 2: Install the Latest Node.js
OpenClaw requires Node.js v22.22.3 or higher — Node 26 is recommended as it starts the Gateway faster and uses less memory than Node 24. macOS does not ship with Node.js pre-installed.
Check if Node.js Is Already Installed
node -v
If this returns v22.22.3 or higher, you can skip to Part 3. If it returns command not found, continue below.
Install Homebrew (if not already installed)
/bin/bash -c "$(curl -fsSL https://raw.githubusercontent.com/Homebrew/install/HEAD/install.sh)"
Install Node.js via Homebrew
brew install node
Verify:
node -v
npm -v
Alternative: Install via Node Version Manager (nvm)
curl -o- https://raw.githubusercontent.com/nvm-sh/nvm/v0.39.7/install.sh | bash
Restart your Terminal, then install Node 26:
nvm install 26
nvm use 26
nvm alias default 26
Part 3: Install Ollama on Apple Silicon
Ollama is the bridge between your Mac mini's GPU and OpenClaw.
Installation
brew install ollama
Or use the official install script:
curl -fsSL https://ollama.com/install.sh | sh
Verify:
ollama --version
Run as a Background Service
brew services start ollama
By default, Ollama listens on 127.0.0.1:11434.
Configuration for Agent Work
launchctl setenv OLLAMA_NUM_PARALLEL 2
launchctl setenv OLLAMA_NUM_CTX 32768
launchctl setenv OLLAMA_KEEP_ALIVE 30m
Part 4: What Your Mac Mini Can Run
On Apple Silicon, the GPU uses unified memory, but macOS reserves a portion. As a rule of thumb, plan for 60–75% of your total RAM to be available for models.
Quick Reference
| Model Size | Memory Needed (4-bit) |
|---|---|
| 7–8B | ~5–6 GB |
| 13–14B | ~9–10 GB |
| 30–32B | ~20 GB |
| 70B | ~40–48 GB |
These figures are for weights only. Add 4–8GB of headroom for the KV cache and runtime overhead.
Recommended Models by Memory Tier
16GB unified memory — Comfortable for 7B–8B models.
| Model | Size | Use Case |
|---|---|---|
| Qwen 3.5 9B | 6.6 GB | Best all-rounder, strong tool calling |
| Granite 4.1 8B | 5.7 GB | Efficient, high benchmark score for its size |
| Ornith-1.0-9B | 5.6 GB | State-of-the-art coding agent for its size |
ollama pull qwen3.5:9b
ollama pull granite4.1:8b
ollama pull ornith:9b
24GB–32GB unified memory — 12B–14B models become daily drivers.
| Model | Size | Use Case |
|---|---|---|
| Gemma 4 26B | ~17 GB | Strong multimodal reasoning, 82.6% MMLU Pro |
| Qwen 3.6 27B | ~17 GB | Excellent general agent, 256K context |
| DeepSeek R1 Distill 14B | ~9 GB | Chain-of-thought reasoning |
ollama pull gemma4:26b
ollama pull qwen3.6:27b
48GB unified memory — The sweet spot. 30B–32B models run comfortably.
| Model | Size | Use Case |
|---|---|---|
| Qwen 3.6 35B-A3B | ~28 GB | Fast MoE, 68.2 tok/s |
| Qwen 2.5 Coder 32B | ~20 GB | Dedicated coding model |
| Gemma 4 31B | ~18 GB | Dense model, 85.2% MMLU Pro |
ollama pull qwen3.6:35b-a3b
ollama pull qwen2.5-coder:32b
64GB unified memory — 70B models at 4-bit become feasible.
ollama pull llama3.3:70b
Part 5: Install OpenClaw
OpenClaw is an open-source, self-hosted AI agent platform that connects large language models to messaging channels. It runs as a persistent gateway daemon on your Mac. Unlike chatbots that wait for you to type, OpenClaw acts proactively via a heartbeat system that checks for pending tasks every 30 minutes.
Installation
npm install -g openclaw
Verify:
openclaw --version
First-Run Configuration
openclaw onboard --install-daemon
This wizard guides you through setting up your first agent, connecting an LLM provider, and configuring at least one messaging channel.
Secrets: the ~/.openclaw/.env File
OpenClaw has a dedicated, trusted secrets file at ~/.openclaw/.env. It is loaded automatically on gateway startup, so any variable you put there is available to openclaw.json via ${VAR} substitution or a --ref-source env SecretRef.
Create the file if it doesn't exist:
mkdir -p ~/.openclaw
touch ~/.openclaw/.env
chmod 600 ~/.openclaw/.env
Add secrets one per line:
# ~/.openclaw/.env
# Ollama doesn't require a real key, but OpenClaw expects an opt-in marker.
OLLAMA_API_KEY=ollama-local
TELEGRAM_BOT_TOKEN=123456:ABC-DEF1234ghIkl-zyx57W2v1u123ew11
# Note: If you need to allow multiple numbers, store them comma-separated in the
# environment variable (e.g., +15555550123,+447700900123). The CSV-to-array
# conversion is handled automatically by OpenClaw.
OPENCLAW_WHATSAPP_ALLOW_FROM=+15555550123
SEARXNG_BASE_URL=http://localhost:8888
GOOGLE_WORKSPACE_CREDENTIALS_PATH=./secrets/google-oauth.json
GOOGLE_WORKSPACE_TOKEN_PATH=./secrets/google-tokens.json
Note: Native OpenClaw channels use their own variable names:
TELEGRAM_BOT_TOKENfor Telegram, andOPENCLAW_WHATSAPP_ALLOW_FROMfor WhatsApp. Plugin-specific variables, likeSEARXNG_BASE_URLandGOOGLE_WORKSPACE_CREDENTIALS_PATH, follow their plugin's own naming convention. You can add as many as you need, one per line.
Connecting to Ollama
OpenClaw talks to Ollama's native API, not the OpenAI-compatible /v1 endpoint. The cleanest way to wire them together is via the openclaw config CLI and a SecretRef pointing at ~/.openclaw/.env.
Step 1: Store the Ollama API key marker in .env
Local Ollama doesn't need a real API key, but OpenClaw still expects one as an opt-in marker. Add it to the secrets file (see the section above) rather than exporting it in your shell:
echo 'OLLAMA_API_KEY=ollama-local' >> ~/.openclaw/.env
Because this writes to .env, the gateway needs a restart to pick it up. If the gateway is not yet running, this happens naturally when you start it.
Step 2: Bind the key to the provider via CLI
Point the provider's apiKey field at that environment variable:
openclaw config set models.providers.ollama.apiKey \
  --ref-provider default \
  --ref-source env \
  --ref-id OLLAMA_API_KEY
This change applies live. No restart needed.
Step 3: Set the base URL (only if not using the default)
Important: If Ollama is running on the same machine as the OpenClaw Gateway, OpenClaw auto-discovers it at
http://127.0.0.1:11434. You can skip this step.
For a remote Ollama host, set an explicit base URL. Do not add /v1 — that selects OpenAI-compatible mode, where tool calling is not reliable:
openclaw config set models.providers.ollama.baseUrl "http://ollama-host:11434"
For a LAN host, use its .local name or IP:
openclaw config set models.providers.ollama.baseUrl "http://gpu-box.local:11434"
Step 4: Verify the connection
First, confirm Ollama itself is reachable from the Gateway host:
curl http://localhost:11434/api/tags
You should get a JSON list of installed models. If this hangs or refuses connection, Ollama isn't running or isn't listening on that port.
Next, ask OpenClaw to probe the provider end-to-end:
openclaw gateway status --deep
The --deep flag runs a deeper health check that includes provider connectivity. If the Ollama provider is listed as healthy, your config is wired correctly.
Finally, confirm OpenClaw can see your models:
openclaw models list --provider ollama
If this returns your pulled models (e.g., qwen3.6:27b), the integration is working.
Step 5: Select a default model
Once discovery works, pick a default model for your agent:
openclaw models set ollama/gemma4
Replace gemma4 with the exact model name from ollama list or openclaw models list --provider ollama.
When You Actually Need to Restart the Gateway
OpenClaw's default hot-reload picks up config changes as you make them. Most openclaw config set commands print a message like:
"Updated channels.whatsapp.enabled. Change will apply without restarting the gateway."
That means the change is live. You do not need to restart.
A restart is only required in these cases:
You edited
~/.openclaw/.env. The environment file is read once at process startup. Any new or changed variable needs a restart to take effect.You installed, updated, or removed a plugin. New code has to be loaded into the running process.
A config key is flagged
restart-required. The CLI will tell you when this is the case.You are troubleshooting a stuck pairing or authorization state. A clean restart clears transient state.
Use restart rather than stop + start, and rather than a bare openclaw gateway (which errors if the gateway is already running):
# Basic restart
openclaw gateway restart

# Graceful restart (waits up to 5 minutes for active work to finish)
openclaw gateway restart --safe

# Immediate restart (no waiting)
openclaw gateway restart --force
Verify after restart:
openclaw gateway status
openclaw channels status --probe
openclaw logs --follow
Part 6: Configure WhatsApp and Telegram
Both channels are configured via openclaw.json (at ~/.openclaw/openclaw.json) and the openclaw config CLI. Changes hot-reload — no restart required. Telegram is the simplest to set up; WhatsApp requires QR code pairing.
Telegram: Where to Find the Token
The bot token comes from @BotFather, Telegram's official bot creation tool.
Open Telegram (mobile or desktop) and search for @BotFather. Confirm the handle is exactly
@BotFather— there are impersonator accounts.Send
/newbotand follow the prompts. You'll be asked for a bot name (display name) and a username (must end inbot, e.g.,my_openclaw_bot).BotFather replies with a token that looks like
123456:ABC-DEF1234ghIkl-zyx57W2v1u123ew11. Copy it.
Telegram: Store the Token as a Secret
Never paste the bot token directly into openclaw.json. Instead, save it to OpenClaw's dedicated secrets file:
# Add the token to ~/.openclaw/.env (create it if needed)
mkdir -p ~/.openclaw
touch ~/.openclaw/.env
chmod 600 ~/.openclaw/.env

# Append the variable (replace with your real token)
echo 'TELEGRAM_BOT_TOKEN=123456:ABC-DEF1234ghIkl-zyx57W2v1u123ew11' >> ~/.openclaw/.env
Note: Because this writes to
.env, the gateway needs a restart to read the new value. If the gateway is not yet running, this happens naturally when you start it.
Telegram: Configure the Channel via CLI
Now bind the channel to that secret using openclaw config. This writes a SecretRef into openclaw.json so the actual token never appears in the config file.
# 1. Enable the Telegram channel and set the DM policy
openclaw config set channels.telegram.enabled true
openclaw config set channels.telegram.dmPolicy "pairing"

# 2. Securely bind the bot token to the environment variable
openclaw config set channels.telegram.botToken \
  --ref-provider default \
  --ref-source env \
  --ref-id TELEGRAM_BOT_TOKEN
Each command prints a confirmation. If it says the change will apply without a restart, no restart is needed.
After running these commands, openclaw.json will contain a reference object for botToken instead of the raw token — something like:
{
  "channels": {
    "telegram": {
      "enabled": true,
      "botToken": {
        "provider": "default",
        "source": "env",
        "id": "TELEGRAM_BOT_TOKEN"
      },
      "dmPolicy": "pairing"
    }
  }
}
You can verify the result with:
openclaw config get channels.telegram
Telegram: Approve Your First DM
Telegram does not use openclaw channels login telegram — the token goes directly into config (as a SecretRef) or environment. If you just edited .env, restart once to load the token. If you have not started the gateway yet, start it now.
Send any message (e.g., "hello" or /start) to your bot from Telegram. This creates a pairing request. Then:
# 1. List pending requests
openclaw pairing list telegram

# 2. Approve the request using the code from the list
openclaw pairing approve telegram <CODE>
Add --notify to tell the requester on Telegram that they've been approved. Pairing codes expire after 1 hour — if a code expires, just send another message to the bot to generate a new one.
Telegram: Re-Pairing
If you need to re-pair — for example, after switching Telegram accounts or resetting the bot — the flow is the same as first pairing: send a new message to the bot, list pending requests, and approve the new code.
If pairing state appears corrupted (the bot ignores all messages, or you're stuck in a loop), clear the state and try again:
openclaw gateway stop
rm ~/.openclaw/credentials/telegram-pairing.json
rm ~/.openclaw/credentials/telegram-allowFrom.json
openclaw gateway restart
Then send a new message to your bot and approve the fresh code.
WhatsApp: Install the Official Plugin
OpenClaw's WhatsApp support ships as a separate plugin, @openclaw/whatsapp, distributed outside the core OpenClaw npm package so WhatsApp-specific runtime dependencies stay isolated.
If you've already run openclaw onboard or openclaw channels add --channel whatsapp, the plugin installation is prompted automatically. You can also install it manually:
openclaw plugins install @openclaw/whatsapp
Because a plugin install loads new code, the gateway needs a restart after this step.
openclaw gateway restart
Verify the plugin is loaded:
openclaw plugins list
WhatsApp: How to Link Your Device
WhatsApp requires QR code pairing, exactly like WhatsApp Web. This uses one of your four linked device slots.
Step 1: Run the channel login
openclaw channels login --channel whatsapp
This displays a QR code in your terminal. Current WhatsApp login is QR-based only.
Warning: Terminal-rendered QRs, screenshots, PDFs, or chat attachments can expire or become unreadable while being relayed from a remote machine. For remote or headless hosts, prefer a direct QR image handoff path over manual terminal capture.
Step 2: Scan the QR code
Open WhatsApp on your phone:
Go to Settings → Linked Devices
Tap Link a Device
Scan the QR code displayed in your terminal
Step 3: Store your phone number as a secret
The WhatsApp channel uses allowFrom to restrict which numbers can message the agent. Store your own number in ~/.openclaw/.env so it never appears in openclaw.json:
echo 'OPENCLAW_WHATSAPP_ALLOW_FROM=+15555550123' >> ~/.openclaw/.env
Replace +15555550123 with your phone number in E.164 format. Including your own number enables self-chat mode, where messages you send to yourself are treated as commands.
Note: If you need to allow multiple numbers, store them comma-separated in the environment variable (e.g.,
+15555550123,+447700900123). The CSV-to-array conversion is handled automatically by OpenClaw. Do not wrap the value in quotes.
Note: Because this writes to
.env, the gateway needs a restart to read the new value. Do it now if the gateway is already running:
openclaw gateway restart
Step 4: Configure WhatsApp via CLI
Bind the channel to that secret using openclaw config:
# 1. Enable the WhatsApp channel and set the DM policy
openclaw config set channels.whatsapp.enabled true
openclaw config set channels.whatsapp.dmPolicy "pairing"

# 2. Securely bind the allowed numbers to the environment variable
openclaw config set channels.whatsapp.allowFrom \
  --ref-provider default \
  --ref-source env \
  --ref-id OPENCLAW_WHATSAPP_ALLOW_FROM
Verify:
openclaw config get channels.whatsapp
Step 5: Approve your first DM
How OpenClaw handles your first inbound message depends on which number you linked during QR pairing. There are two cases.
Case A — Self-chat mode (you linked your own personal number)
This is the most common first setup. You scanned the QR code with your personal WhatsApp, so OpenClaw is now linked to your own number, and you message yourself.
Open WhatsApp on your phone.
Tap the new chat icon and find yourself. WhatsApp labels this thread "Message yourself" — it's usually the first entry, or you can search your own name/number.
Send any message ("hello",
/start, or a period).Because your own number is allowed by default when no other
allowFromentries are configured, OpenClaw processes the message directly. No pairing code is generated.OpenClaw never auto-pairs outbound messages you send from your own linked device to yourself, so you will not see a code prompt here — that's expected.
If you don't get a reply, jump to the troubleshooting block below.
Case B — Separate dedicated number (you linked a second number)
Here, OpenClaw is linked to a different WhatsApp number, and you message it from your personal phone.
Open WhatsApp on your personal phone.
Tap the new chat icon and search for the OpenClaw-linked number (the one you scanned the QR code with). Save it as a contact if it helps.
Send any message.
OpenClaw sees an unknown sender, holds the message, and replies with an 8-character pairing code (valid for 1 hour).
Approve the code from your Mac mini terminal:
openclaw pairing list whatsapp
openclaw pairing approve whatsapp <CODE>
Add
--notifyif you want the bot to send a confirmation back to the sender.
Troubleshooting (both cases)
If nothing happens after you send the message:
openclaw gateway status
openclaw config get channels.whatsapp
openclaw logs --follow
Confirm the gateway is running.
Verify the number is in E.164 format (e.g.,
+15555550123) and bound in config.Watch the logs for inbound activity while you send the message.
Pending requests are capped at 3 per channel — additional requests are ignored until one expires or is approved.
Testing outbound delivery from the CLI
You can send a message from the terminal to test delivery:
openclaw message send --channel whatsapp --target +15551234567 --message hi
This sends an outbound message from the assistant. It does not create a pairing request — pairing only triggers on inbound messages from unknown senders.
Step 6: Verify connectivity
openclaw health
You should see WhatsApp listed as "connected."
WhatsApp: Re-Pairing
If WhatsApp loses its link (for example, you removed the linked device from your phone, or the session expired), re-link it the same way you did originally:
openclaw channels login --channel whatsapp
Scan the new QR code from Settings → Linked Devices → Link a Device. Then restart the gateway:
openclaw gateway restart
If pairing state appears corrupted, clear it and re-link:
openclaw gateway stop
rm ~/.openclaw/credentials/whatsapp-pairing.json
rm ~/.openclaw/credentials/whatsapp-allowFrom.json
rm -rf ~/.openclaw/credentials/whatsapp-session/
openclaw gateway restart
Then run openclaw channels login --channel whatsapp again to scan a fresh QR code, and approve the new pairing code.
Part 7: Connect from Anywhere with Tailscale
Everything up to this point assumes your Mac mini is reachable on the local network. To use the OpenClaw mobile app from outside your home — or even just from your phone on cellular — you need a private, encrypted path to the gateway. Tailscale provides that: a WireGuard-based mesh VPN that gives every device a stable address and an HTTPS endpoint without opening a single port on your router.
The gateway's built-in gateway.tailscale.mode="serve" setting tells OpenClaw to expose itself on your tailnet via Tailscale Serve. Your phone connects over the tailnet; OpenClaw never binds to a public interface.
Prerequisites
A Tailscale account — sign up at tailscale.com. The free tier covers personal use.
The Homebrew formula, not the GUI app. The macOS app store version and the --cask install are sandboxed and cannot run the tailscale serve subcommand, which OpenClaw needs to publish itself on the tailnet. Install the CLI formula instead:
brew install --formula tailscale
Step 1: Authenticate Your Mac Mini
Start the daemon and log in:
sudo brew services start tailscale
sudo tailscale up
A URL prints in your terminal. Open it in a browser and log in with your Tailscale account. Once authorized, verify the node is registered:
tailscale status
You should see your Mac mini listed with a 100.x.x.x address and its MagicDNS name (e.g., night-thoughts.tail305232.ts.net).
Step 2: Enable Tailscale Serve on the Gateway
Point OpenClaw at Tailscale Serve and restart so it picks up the change:
openclaw config set gateway.tailscale.mode "serve"
openclaw gateway restart
openclaw gateway status --deep
Look for these two lines in the status output:
Runtime: running
Connectivity probe: ok
And in the logs, OpenClaw will announce the HTTPS endpoint it configured:
gateway/tailscale serve enabled: https://night-thoughts.tail305232.ts.net/
Note: OpenClaw requires
gateway.bind="loopback"whengateway.tailscale.mode="serve". Tailscale Serve is a reverse proxy: it terminates TLS and forwards traffic to127.0.0.1:18789. Do not change the bind setting.
Step 3: Install Tailscale on Your Phone
The OpenClaw mobile app connects over the tailnet, so your phone must be on the same tailnet as the Mac mini.
Android: install Tailscale from the Play Store.
iOS: install Tailscale from the App Store.
Open the app and sign in with the same Tailscale account you used on the Mac mini. Toggle the VPN switch on. Your Mac mini should appear in the machine list with a green dot.
Known Android quirk: if the OpenClaw app later reports
Unable to resolve host, open the Tailscale app on your phone, go to Settings, and turn off "Use Tailscale DNS". This works around a MagicDNS resolution bug on some Android builds.
Step 4: Pair the OpenClaw Mobile App
On the Mac mini, generate the pairing QR code:
openclaw qr
The output shows the gateway URL and a QR code. Note the Gateway: line — it should read wss://<your-magicdns-name>, not the old hostname.
Scan the QR code with the OpenClaw app on your phone (Onboarding → Scan QR). The app will submit a pairing request.
Approve it on the Mac mini:
openclaw devices list
openclaw devices approve <requestId>
Then verify the pairing:
openclaw nodes status
Your phone appears as a connected node. You can now chat with the agent from anywhere your phone has internet — no port forwarding, no dynamic DNS, no exposed attack surface.
Fingerprint Verification
The OpenClaw mobile app uses TLS certificate pinning (Trust On First Use) to prevent man-in-the-middle attacks. On first connection, it asks for the SHA-256 fingerprint of the certificate Tailscale presents for your MagicDNS name.
Get it on the Mac mini:
tailscale cert night-thoughts.tail305232.ts.net
openssl x509 -in night-thoughts.tail305232.ts.net.crt -noout -fingerprint -sha256
Paste the hex value (with colons) into the app's fingerprint field. The app remembers it for future connections.
Daily Operation
Tailscale runs as a background service and reconnects automatically after reboots. OpenClaw publishes the Serve route on every gateway start. Nothing to do — the tunnel comes up before you need it.
To confirm everything is healthy at any time:
tailscale status           # is this machine on the tailnet?
tailscale serve status     # is OpenClaw publishing itself?
openclaw gateway status    # is the gateway running?
Part 8: Add Local Web Search with SearXNG on Colima
OpenClaw's web_search tool can be backed by SearXNG, a self-hosted meta-search engine. SearXNG aggregates results from Google, Bing, DuckDuckGo, and other engines, and returns them to OpenClaw over a local HTTP endpoint. Queries never leave your network, and there is no API key or per-query cost.
To run SearXNG on an always-on Mac mini, you need Docker that starts before any user logs in. Docker Desktop cannot do this — it requires a graphical login. The solution is Colima, a lightweight container runtime that runs a Linux VM via QEMU and can be managed by a system LaunchDaemon.
Why Colima + colima-pulse
Docker Desktop on macOS is a GUI application. It does not start until a user logs in, which defeats the purpose of an always-on, headless server. Colima runs entirely from the command line, uses significantly less memory (~400 MB idle vs ~1.5 GB), and can be started at boot by a LaunchDaemon — before any user session exists.
colima-pulse is a small script that installs and manages that LaunchDaemon. It handles:
Starting Colima at boot, before login.
Waiting until Docker actually responds before continuing.
Recovering cleanly after a reboot or power loss.
Explicit-only reset (safe by default).
It uses QEMU rather than Apple's VZ framework because QEMU has proven more reliable for headless, pre-login startup.
Prerequisites
Admin rights (for LaunchDaemon install) and Homebrew (already installed in Part 2). The script installs colima, docker, and qemu if they are missing.
FileVault warning: If FileVault is enabled, macOS will not expose
/Users/...until the disk is unlocked at the login screen. Containers may wait until the first unlock before starting. For fully unattended operation, disable FileVault. This is macOS behaviour, not a limitation of Colima.
Step 1: Install Colima Pulse
Clone the repository:
cd ~
git clone https://github.com/MrCee/colima-pulse
cd colima-pulse
Copy the template and set HOMEBREW_USER to your macOS username:
cp .env.example .env
sed -i '' "s|^HOMEBREW_USER=.*|HOMEBREW_USER=$(whoami)|" .env
Optional tuning: The template ships with sensible defaults. Review the active settings:
grep -vE '^\s*#|^\s*$' .env
| Variable | Default | Notes |
|---|---|---|
HOMEBREW_USER |
(required) | Must match a real macOS user with a valid home directory. |
COLIMA_PROFILE |
default |
Colima profile name. |
COLIMA_RUNTIME |
docker |
Must be docker. |
COLIMA_VM_TYPE |
qemu |
Must be qemu. Chosen for headless reliability. |
COLIMA_CPUS |
2 |
vCPUs allocated to the Colima VM. |
COLIMA_MEMORY |
2 |
Memory in GB. Bump to 4 if SearXNG feels slow. |
COLIMA_DISK |
20 |
Disk in GB. |
CLEAN_OTHER_COLIMA_DAEMONS |
prompt |
prompt, true, or false. |
COLIMA_START_FILTER_INFO |
true |
Filter Colima start output. |
For example, to give the VM 4 GB of RAM:
echo 'COLIMA_MEMORY=4' >> .env
Then run the installer:
./colima-pulse.sh
The script stops any conflicting processes, starts Colima with QEMU and the Docker runtime, waits until Docker is actually usable, and installs a LaunchDaemon labelled homebrew.mrcee.colima-pulse.
Verify the LaunchDaemon is loaded:
sudo launchctl print system | grep -i colima
You should see the Colima Pulse service listed.
Step 2: Verify Docker Works Headless
Confirm Colima is running and the Docker CLI can reach the daemon:
colima status
docker info
colima status should show Running. docker info should return the Docker daemon details without errors.
Note: Colima uses two socket paths — the default
DOCKER_HOSTand Colima's own socket. The Colima context is set automatically. Ifdocker infofails, check thatDOCKER_HOSTis not pointing at Docker Desktop's stale socket.
Step 3: Harden Colima's Seccomp Profile
Colima's Docker daemon uses a seccomp profile that may block newer syscalls required by modern runc versions. This can cause container startup failures. The long-term fix is to install Docker's latest default seccomp profile and point Colima at it.
Step 3a: Install yq
The configuration change below uses yq, a command-line YAML processor, so the colima.yaml file can be updated without opening an editor:
brew install yq
Verify the Go-based version is installed:
yq --version
You should see output starting with yq (https://github.com/mikefarah/yq/) version v4.. The v4 major version matters — the command syntax below uses v4 features.
Note: Homebrew also has a package named
python-yq, which is a different tool with incompatible syntax. If it was previously installed, remove it withbrew uninstall python-yqto avoid a command-name conflict.
Step 3b: Download the seccomp profile
Download Docker's default seccomp profile:
curl -o /tmp/seccomp.json \
  https://raw.githubusercontent.com/moby/profiles/main/seccomp/default.json
Confirm the download is valid JSON and not an error page:
head -c 60 /tmp/seccomp.json
You should see { "defaultAction": "SCMP_ACT_ERRNO". If the output looks like HTML or an error message, the URL is wrong.
Step 3c: Copy the profile into the Colima VM
colima ssh -- sudo mkdir -p /etc/docker
colima ssh -- sudo tee /etc/docker/seccomp.json < /tmp/seccomp.json
Step 3d: Point Colima's Docker daemon at the profile
Use yq to write the docker.seccomp-profile setting directly into the Colima config, then restart Colima:
yq -i '.docker."seccomp-profile" = "/etc/docker/seccomp.json"' ~/.colima/default/colima.yaml && colima restart
This targets the default Colima profile. If you use a named profile, replace default in the path with your profile name.
Step 3e: Verify the profile is active
docker info | grep -i seccomp
The output should show the custom profile path.
Quick fix alternative: If updating the profile is not feasible, set
seccomp-profile: "unconfined"to disable syscall filtering. This reduces security and should only be used as a temporary workaround.
Step 4: Create the SearXNG Configuration Directory
Create a directory on the host for the SearXNG settings file:
mkdir -p ~/searxng
Generate a random secret key and write ~/searxng/settings.yml:
SECRET=$(openssl rand -hex 32)

cat > ~/searxng/settings.yml <<EOF
use_default_settings: true

server:
  secret_key: "${SECRET}"
  limiter: false
  public_instance: false

search:
  formats:
    - html
    - json

doi_resolvers:
  oadoi.org: "https://oadoi.org/"
  doi.org: "https://doi.org/"
default_doi_resolver: "oadoi.org"
EOF
Why
use_default_settings: truematters: SearXNG's defaultsettings.ymlcontains the full list of search engines, categories, and other required internals. A custom settings file replaces the defaults entirely unless you explicitly tell SearXNG to merge them. Without this line, zero engines are enabled and every search returns an HTTP 500 error.
Why the secret key matters: SearXNG validates its settings against a schema on startup.
server.secret_keyis required and must be a non-empty string. Without it, the worker process aborts withValueError: Invalid settings.ymlbefore the web server can bind.
Why the DOI resolvers matter: Newer SearXNG versions expect a
doi_resolversmap with adefault_doi_resolver. Omitting it causes aKeyErrorcrash on the first search request.
Why JSON matters: SearXNG disables JSON output by default on new installs. Without
formats: [html, json], the OpenClaw plugin gets an HTML page instead of structured results, and search fails.
Step 5: Run SearXNG with a Restart Policy
Stop and remove any previous container, then start the hardened one:
docker stop searxng 2>/dev/null; docker rm searxng 2>/dev/null

docker run -d \
  --restart unless-stopped \
  --name searxng \
  -p 127.0.0.1:8888:8080 \
  -v ~/searxng/settings.yml:/etc/searxng/settings.yml:ro \
  --read-only \
  --tmpfs /tmp:size=100m \
  --tmpfs /etc/ssl/certs:size=16m \
  --cap-drop=ALL \
  --security-opt=no-new-privileges \
  --memory=512m \
  --cpus=1.0 \
  searxng/searxng
Why each flag matters:
| Flag | Purpose |
|---|---|
--restart unless-stopped |
Container starts automatically when Colima/Docker starts or the Mac reboots. It stays stopped only if you manually stopped it. |
-p 127.0.0.1:8888:8080 |
Binds to loopback only. SearXNG is not reachable from the LAN or the internet. Only processes on the Mac mini can query it. |
-v ~/searxng/settings.yml:/etc/searxng/settings.yml:ro |
Mounts your settings file read-only. JSON API stays enabled and the secret key persists across restarts. |
--read-only |
The container's root filesystem is mounted read-only. Prevents runtime writes to the image layer. |
--tmpfs /tmp:size=100m |
Provides a writable /tmp for SearXNG's cache, capped at 100 MB. |
--tmpfs /etc/ssl/certs:size=16m |
Gives the certificate updater a writable scratch space so it does not fail on the read-only root filesystem. |
--cap-drop=ALL |
Drops all Linux capabilities. SearXNG does not need any. |
--security-opt=no-new-privileges |
Prevents privilege escalation via setuid binaries inside the container. |
--memory=512m |
Caps container memory at 512 MB. Prevents a runaway SearXNG from starving the host. |
--cpus=1.0 |
Caps the container at one CPU core. |
Verify it's up and returning JSON:
curl 'http://localhost:8888/search?q=test&format=json'
You should get a JSON object with a results array. If you get HTML back, the settings file isn't mounted correctly or JSON isn't enabled under search.formats.
Step 6: Install the SearXNG Plugin
openclaw plugins install @openclaw/searxng-plugin
The official plugin requires OpenClaw >= 2026.9.7. If you are on an earlier version, the install will fail with a plugin API version error. Update OpenClaw first with openclaw update, or use a community alternative such as openclaw-local-searxng-search.
Because a plugin install loads new code, restart the gateway once:
openclaw gateway restart
Verify the plugin is loaded:
openclaw plugins list | grep searxng
You should see the SearXNG plugin listed as enabled. If it's missing, re-run the install command and check openclaw logs --follow for plugin loading errors.
Step 7: Configure the Base URL
Add the SearXNG base URL to ~/.openclaw/.env so the plugin can find your local instance:
echo 'SEARXNG_BASE_URL=http://localhost:8888' >> ~/.openclaw/.env
Do not wrap the value in quotes. Because this writes to .env, restart the gateway once to load it:
openclaw gateway restart
Step 8: Select SearXNG as the Provider
OpenClaw will not automatically pick SearXNG over a higher-priority provider that already has credentials configured. You must explicitly select it:
openclaw config set tools.web.search.provider "searxng"
This change hot-reloads — no restart required. Alternatively, use the interactive setup wizard:
openclaw configure --section web
Step 9: Configure the Plugin (Optional)
The plugin accepts optional category and language filters, and you can bind baseUrl to the environment variable with a SecretRef:
openclaw config set plugins.entries.searxng.config.webSearch.baseUrl \
  --ref-provider default \
  --ref-source env \
  --ref-id SEARXNG_BASE_URL

openclaw config set plugins.entries.searxng.config.webSearch.categories "general,news"
openclaw config set plugins.entries.searxng.config.webSearch.language "en"
These changes hot-reload. No restart required.
Step 10: Verify
Verify the provider is selected and the plugin is loaded:
openclaw config get tools.web.search.provider
openclaw config get plugins.entries.searxng
Then test from any connected chat channel:
Search the web for today's top technology news
The agent should invoke the web_search tool, query your local SearXNG instance, and return structured results with titles, URLs, and snippets.
How SearXNG on Colima Works
Transport: OpenClaw calls SearXNG's native
format=jsonendpoint. It is not doing HTML scraping.Network guard:
http://base URLs must target a trusted private or loopback host. Public hosts must usehttps://. Sincelocalhostis a loopback address, your local setup passes this check.Auto-detection order: SearXNG is checked last in auto-detection (order 200), after API-backed providers, DuckDuckGo, and Ollama Web Search. This is why Step 8's explicit
openclaw config setis necessary — the auto-detector will not choose it for you if any other provider has credentials.No API key: SearXNG works with any instance out of the box.
Boot order: Colima Pulse starts Colima before login. Docker starts. The
--restart unless-stoppedpolicy brings SearXNG up. By the time OpenClaw's gateway starts, SearXNG is already listening.
Troubleshooting
If web search does not work:
colima status
docker ps
curl http://127.0.0.1:8888
openclaw gateway status
openclaw plugins list
openclaw logs --follow
Confirm Colima is running (
colima statusshowsRunning).Confirm the SearXNG container is up (
docker psshows it asUp).Confirm SearXNG responds to
curl.Confirm the gateway is running and the SearXNG plugin is listed as
enabled.Watch the logs while you trigger a search to see where the chain broke.
Common SearXNG errors:
| Symptom | Cause | Fix |
|---|---|---|
Container status Restarting (1) |
Worker crashes on startup | Check docker logs searxng for the abort reason |
ValueError: Invalid settings.yml |
server.secret_key missing or empty |
Add a generated key under server: |
can't create /etc/ssl/certs/ca-certificates.crt.new: Read-only file system |
--read-only blocks cert writes |
Add --tmpfs /etc/ssl/certs:size=16m |
| HTTP 500 on every search | use_default_settings: true missing |
Add it to the top of settings.yml |
KeyError: 'default_doi_resolver' |
doi_resolvers block missing |
Add the block and restart |
HTTP 403 on format=json |
json not in search.formats |
Ensure the list includes both html and json |
If the container is not running after a reboot, check the Colima Pulse LaunchDaemon:
sudo launchctl print system | grep -i colima
docker ps
If Colima is running but the container is stopped, check the container logs:
docker logs searxng
Full Reset (If Needed)
If Colima or the container state becomes corrupted, colima-pulse provides an explicit reset path. Review the help first:
./colima-pulse.sh --help
A full reset with a backup move:
./colima-pulse.sh --full-reset --backup=move
This stops Colima, moves the existing state aside, and starts fresh.
Part 9: Configure Gmail and Google Calendar
OpenClaw's Google Workspace integration is handled through the @tensorfold/openclaw-google-workspace plugin — one install, one OAuth flow, six services (Gmail, Calendar, Drive, Contacts, Tasks, Sheets).
Note: Google also released a Workspace CLI (
gws) in March 2026 that can integrate with OpenClaw. It is not an officially supported Google product and requires a different setup path. This article focuses on the community plugin for stability and broader service coverage.
Step 1: Clone and Install the Plugin
The published npm package for this plugin currently ships without compiled JavaScript output — only TypeScript source. OpenClaw rejects installed plugins that point at .ts entry files without a corresponding dist/ build. Installing from a local source checkout bypasses this restriction, because OpenClaw supports TypeScript source fallback for local development paths.
Clone the repository and install its runtime dependencies:
cd ~/Downloads
git clone https://github.com/tensorfold/openclaw-google-workspace.git
cd openclaw-google-workspace
npm install
Install the plugin from the local checkout using link mode. The -l flag avoids copying the directory and registers it in plugins.load.paths:
openclaw plugins install -l .
Because a plugin install loads new code, restart the gateway once:
openclaw gateway restart
Verify the plugin is loaded:
openclaw plugins list | grep openclaw-google-workspace
You should see openclaw-google-workspace listed as enabled. If it's missing, re-run the install command and check openclaw logs --follow for plugin loading errors.
Step 2: Create a Google Cloud Project
This is the part that trips most people up. Here is the exact sequence:
2a. Create the project
Go to the Google Cloud Console
Click the project dropdown at the top → New Project
Name it (e.g.,
openclaw-workspace) → CreateSelect the new project from the dropdown
2b. Enable the required APIs
Go to APIs & Services → Library and enable each API you need:
| API | Required For |
|---|---|
| Gmail API | Gmail tools |
| Google Calendar API | Calendar tools |
| Google Drive API | Drive tools (optional) |
| People API | Contacts (optional) |
| Tasks API | Tasks (optional) |
| Google Sheets API | Sheets (optional) |
Enable only the APIs for services you plan to use. You can always enable more later and re-authorize.
2c. Configure the OAuth consent screen
Go to APIs & Services → OAuth consent screen:
Select External user type (unless you have a Google Workspace org)
Fill in: App name (e.g., "OpenClaw Agent"), User support email, Developer contact email
Click Save and Continue
On the Scopes page, add the scopes you need:
https://www.googleapis.com/auth/gmail.modifyhttps://www.googleapis.com/auth/gmail.sendhttps://www.googleapis.com/auth/calendar.events(add Drive, Contacts, Tasks, Sheets scopes if using those services)
Click Save and Continue
On the Test users page, add the Google account email that will use the agent. This is critical — if the user is not listed as a test user, OAuth will fail with a
403 access_deniederror.
The consent screen can stay in "Testing" status; you do not need to publish or verify the app.
2d. Create OAuth credentials
Go to APIs & Services → Credentials:
Click + Create Credentials → OAuth client ID
Application type: Desktop app
Name: anything descriptive (e.g., "OpenClaw Workspace Plugin")
Click Create
Click Download JSON on the confirmation dialog — the file is named
client_secret_*.json
Step 3: Place the Credentials File
mkdir -p ~/.openclaw/secrets
cp ~/Downloads/client_secret_*.json ~/.openclaw/secrets/google-oauth.json
chmod 600 ~/.openclaw/secrets/google-oauth.json
Step 4: Store the Credential Paths as Secrets
The Google Workspace plugin accepts environment variable overrides for the credential and token paths. Store them in ~/.openclaw/.env:
echo 'GOOGLE_WORKSPACE_CREDENTIALS_PATH=./secrets/google-oauth.json' >> ~/.openclaw/.env
echo 'GOOGLE_WORKSPACE_TOKEN_PATH=./secrets/google-tokens.json' >> ~/.openclaw/.env
These paths are relative to ~/.openclaw/, so the plugin resolves them correctly regardless of where the gateway is started from. Do not wrap the values in quotes. Because this writes to .env, restart the gateway once to load the new variables:
openclaw gateway restart
Step 5: Configure the Plugin via CLI
Bind the plugin configuration to those environment variables using openclaw config:
# 1. Enable the plugin
openclaw config set plugins.entries.openclaw-google-workspace.enabled true

# 2. Bind the credentials path to the environment variable
openclaw config set plugins.entries.openclaw-google-workspace.config.credentialsPath \
  --ref-provider default \
  --ref-source env \
  --ref-id GOOGLE_WORKSPACE_CREDENTIALS_PATH

# 3. Bind the token path to the environment variable
openclaw config set plugins.entries.openclaw-google-workspace.config.tokenPath \
  --ref-provider default \
  --ref-source env \
  --ref-id GOOGLE_WORKSPACE_TOKEN_PATH

# 4. Enable the services you need
openclaw config set plugins.entries.openclaw-google-workspace.config.services.gmail.enabled true
openclaw config set plugins.entries.openclaw-google-workspace.config.services.calendar.enabled true
These changes hot-reload. No restart required.
Verify:
openclaw config get plugins.entries.openclaw-google-workspace
Note: The Google Workspace plugin also accepts environment variable overrides for service toggles (e.g.,
GOOGLE_WORKSPACE_GMAIL_ENABLED,GOOGLE_WORKSPACE_CALENDAR_ENABLED). If you prefer to control service enablement entirely via environment variables, you can skip step 4 above and add those to~/.openclaw/.envinstead.
Step 6: Separate Reader and Sender Agents (Recommended)
If the same agent can both read untrusted email content and send messages, a malicious email can trigger a send — this is prompt injection, and it has no complete technical fix.
The most valuable security boundary in this entire setup is splitting Google Workspace access across two agents:
Reader agent — read-only tools. Processes untrusted email and calendar content.
Sender agent — read and send tools. Never touches untrusted content directly.
The reader agent summarizes or drafts. You review the output. The sender agent takes action only on what you approve.
Configure the reader agent
Create the reader agent and give it the read-only tool set:
# Identity and workspace
openclaw config set agents.list[0].id "workspace_reader"
openclaw config set agents.list[0].name "Google Workspace Reader"
openclaw config set agents.list[0].workspace "~/.openclaw/workspace-reader"

# Tool policy — minimal base, then explicit read-only allowlist
openclaw config set agents.list[0].tools.profile "minimal"
openclaw config set agents.list[0].tools.allow '[
  "google_gmail_search",
  "google_gmail_read",
  "google_gmail_list_unread",
  "google_gmail_list_by_label",
  "google_calendar_list_events",
  "google_calendar_find_next_meeting",
  "google_drive_list_files",
  "google_drive_read_file",
  "google_drive_search",
  "google_contacts_search",
  "google_contacts_get",
  "google_tasks_list",
  "google_sheets_read"
]'
openclaw config set agents.list[0].tools.deny '[
  "google_gmail_send",
  "google_calendar_create_event",
  "google_calendar_update_event",
  "google_calendar_delete_event",
  "google_drive_create_file",
  "google_tasks_create",
  "google_tasks_complete",
  "google_sheets_write"
]'
The explicit deny list makes the intent auditable, even though profile: "minimal" plus the allow list already excludes those tools.
Configure the sender agent
Create the sender agent and give it only the send-capable tools:
# Identity and workspace
openclaw config set agents.list[1].id "workspace_sender"
openclaw config set agents.list[1].name "Google Workspace Sender"
openclaw config set agents.list[1].workspace "~/.openclaw/workspace-sender"

# Tool policy — minimal base, then explicit send allowlist
openclaw config set agents.list[1].tools.profile "minimal"
openclaw config set agents.list[1].tools.allow '[
  "google_gmail_send",
  "google_calendar_create_event"
]'
openclaw config set agents.list[1].tools.deny '[
  "google_gmail_search",
  "google_gmail_read",
  "google_gmail_list_unread",
  "google_gmail_list_by_label"
]'
The deny list ensures the sender never has a tool to fetch inbox content. If a malicious email somehow reaches the sender agent, there is no google_gmail_read tool available to act on it.
How the boundary works
Reader can search, read, and list Gmail, Calendar, Drive, Contacts, Tasks, and Sheets. It cannot send email, create events, or write files.
Sender can send email and create calendar events. It cannot read inbox content.
Each agent has its own credential store at
~/.openclaw/agents/<agentId>/agent/. OAuth refresh tokens are not shared between agents — you authenticate each one separately.
Verify the tool policies
After running the config set commands, validate:
openclaw config validate
Check that each agent has the expected tool set:
openclaw agents list
openclaw tools list --agent workspace_reader
openclaw tools list --agent workspace_sender
The reader should show only google_* read tools. The sender should show only google_gmail_send and google_calendar_create_event.
Why this matters: The reader processes untrusted content from email and the web. The sender takes irreversible actions. Keeping them on separate agents means a prompt injection in an email cannot directly trigger a send — the sender agent never sees the malicious content in the first place.
Step 7: Authorize Each Agent via Chat
Each agent needs its own Google Workspace authorization. Send from any connected chat channel, addressing the reader agent first:
Run
google_workspace_begin_auth
OpenClaw replies with an OAuth URL. Open it, sign in with your Google account, grant consent, and copy the authorization code. Then send:
Run
google_workspace_complete_authwith code4/0AXY...
Repeat the same flow for the sender agent. Because each agent has its own credential store, you will go through OAuth twice — once for the reader and once for the sender.
Once both are authorized, test the reader:
Search my inbox for unread messages from this week
Then test the sender:
Send a test email to my own address with the subject "OpenClaw test"
The reader should return a summary without sending anything. The sender should send the email without reading your inbox.
Google Workspace: Re-Authorization
If a token expires, you revoke access from your Google account, or you change the scopes, re-authorize the affected agent the same way you did originally: send google_workspace_begin_auth from any connected chat channel, follow the OAuth URL, and complete the flow with google_workspace_complete_auth.
If a token file becomes corrupted, clear it and try again:
openclaw gateway stop
rm ~/.openclaw/secrets/google-tokens.json
openclaw gateway restart
Then run google_workspace_begin_auth again for the affected agent to generate a fresh token.
Part 10: Verify Connectivity with a Daily Weather Message
The best way to confirm everything works — Ollama, SearXNG, OpenClaw, and your messaging channel — is to set up a simple scheduled task. This tests model inference, tool calling, scheduling, and message delivery in one go.
The Task
Send me the weather forecast every day at 7 AM via WhatsApp.
OpenClaw's cron system handles this. You can add it from the command line:
openclaw cron add \
  --name "Morning weather brief" \
  --cron "0 7 * * *" \
  --tz "Asia/Hong_Kong" \
  --session isolated \
  --message "Get today's weather for Hong Kong. Write a short briefing: temperature range, precipitation chance, and whether an umbrella is needed. Skip pleasantries." \
  --announce \
  --channel whatsapp \
  --to "+85270753575"
Replace Hong Kong, Asia/Hong_Kong, and +85270753575 with your location, timezone, and phone number.
Flag reference:
| Flag | Purpose |
|---|---|
--cron "0 7 * * *" |
Standard 5-field cron expression. This one means every day at 07:00. |
--tz "Asia/Hong_Kong" |
The timezone the cron expression is evaluated in. Without it, the schedule is interpreted in UTC. |
--session isolated |
Runs the task in a dedicated agent turn, separate from the main conversation. |
--message |
The prompt the agent receives when the task fires. |
--announce |
Delivers the result to the channel you specify. (The older --deliver announce still works but is deprecated.) |
--channel whatsapp |
Delivers via your connected WhatsApp. |
--to "+852..." |
The recipient phone number in E.164 format. |
Why these choices matter:
| Choice | Reason |
|---|---|
--session isolated |
The briefing doesn't need yesterday's conversation context |
--announce |
Sends the result to the channel you specify |
--channel whatsapp |
Delivers via your connected WhatsApp |
"Skip pleasantries" |
Without this, you get "Good morning! I hope you're having a wonderful day!" every single day |
That last point generalizes: a scheduled prompt is read hundreds of times, so it's worth over-specifying the format. Anything mildly annoying on day one becomes intolerable by day thirty.
Testing It Immediately
You don't have to wait until 7 AM. List your jobs to get the job ID, then run it once manually:
openclaw cron list
openclaw cron run <job-id>
You should receive the weather briefing via WhatsApp within seconds. If you do, your entire stack is working: Ollama served the model, SearXNG handled any search calls, OpenClaw executed the tool calls, and the WhatsApp channel delivered the message.
If it doesn't arrive, check:
openclaw health
openclaw logs --follow
The health check confirms channel connectivity; the logs show you exactly where the chain broke.
Troubleshooting: "Secret reference was not found"
If the cron job fires but the agent turn fails with an error like:
Secret owner provider:ollama is configured but unavailable (secret reference was not found)
…the gateway process cannot resolve a SecretRef from ~/.openclaw/.env. The most common causes, in order of likelihood:
The gateway was not restarted after editing
.env. The file is read once at startup. Fix:openclaw gateway stop openclaw gateway restartThe value in
.envis wrapped in quotes. WriteOLLAMA_API_KEY=ollama-local, notOLLAMA_API_KEY="ollama-local". The loader reads the raw text after=, so quotes become part of the value.The variable name in
--ref-iddoesn't match the.envkey. Check withopenclaw config get models.providers.ollama.apiKeyand compare to the exact key in~/.openclaw/.env.
Diagnose with:
openclaw secrets audit --check --json
Look for "unresolvedRefCount": 0. If it's greater than zero, a SecretRef is not resolving. If the audit passes but the running gateway still errors, restart the gateway — the audit runs in a fresh process and reads .env now, while the gateway holds the snapshot from its last startup.
The Architecture in Summary
| Layer | Tool | Purpose |
|---|---|---|
| Server Mode | macOS pmset, auto-login, SSH |
Never sleep, always reachable |
| Runtime | Node.js 26 | Required for OpenClaw |
| Inference | Ollama | Serves local models on localhost:11434 |
| Container Runtime | Colima + colima-pulse | Headless Docker at boot, before login; QEMU + LaunchDaemon |
| Web Search | SearXNG (Docker) | Self-hosted meta-search on 127.0.0.1:8888; queries never leave the network |
| Remote Access | Tailscale Serve | Encrypted HTTPS endpoint for the OpenClaw mobile app; gateway stays loopback-bound |
| Agent Platform | OpenClaw | Heartbeat-driven autonomous tasks via messaging channels |
| Secrets | ~/.openclaw/.env + SecretRef |
Bot tokens, phone numbers, and credential paths, loaded on gateway startup |
| Channels | Telegram, WhatsApp | Bot API + official QR-linked plugin |
| Integrations | Google Workspace plugin | Gmail, Calendar, Drive, Contacts, Tasks, Sheets |
| Security | Reader / Sender agent split | Read-only agent for untrusted content; send-capable agent that never reads it |
| Container Security | Seccomp, read-only FS, capability drop, loopback binding | SearXNG runs hardened: no new privileges, no capabilities, 512 MB memory cap, loopback-only port |
Your Mac mini is now a server. It runs Node.js, Ollama with local models, Colima with a hardened SearXNG container for private web search, and OpenClaw connects to them — reachable from Telegram, WhatsApp, and the OpenClaw mobile app over Tailscale, and ready to receive messages from your connected channels and act on them proactively. The daily weather message is the simplest possible proof that it works — and from there, the same scheduling system that delivers a forecast at 7 AM can deliver a morning briefing, monitor a server, or run any recurring task you can describe. Whether you have a 16GB base model running a 9B model or a 64GB configuration running a 70B model, the setup is the same — and it's sitting on your desk, quiet, and it's yours.